![]() | XYZ2DEM Importer - Tutorials, Examples, Applications
| ImageJ Plugins by i3mainz
| ImageJ
| Privacy
| Imprint
| XYZ2DEM Importer - Tutorials, Examples, Applications
| ImageJ Plugins by i3mainz
| ImageJ
| Privacy
| Imprint
XYZ2DEM Importer - Notes on Geocoding
XYZ2DEM Importer can save the geocoding information of your input data. As a consequence, you might process your data with ImageJ first and export your resulting image to a Geographic Information System (GIS) afterwards while maintaining the original geocoding information.
Preliminaries:
- Download and install XYZ2DEM Importer.
- Download input data: five_points_without_comments.txt.
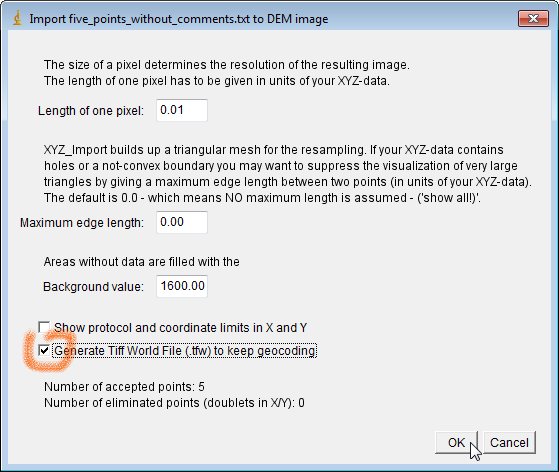
Example: Import five_points_with_comments.txt:
Plugins > XYZ2DEM Importer: five_points_with_comments.txt
by simply using the automatically proposed set of input parameters.
Check the optionGenerate Tiff World File (.tfw) to keep geocoding:
You get the results:
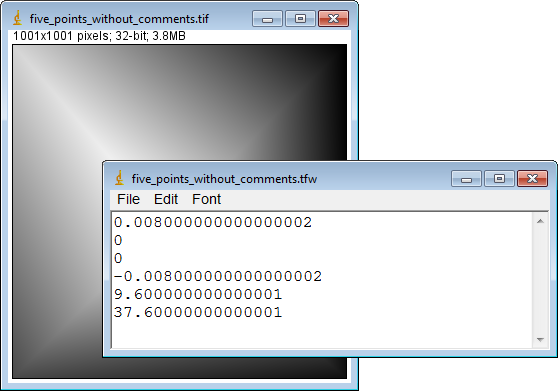
Save both files to the same directory. Both files should have the same filenames followed by the extensions
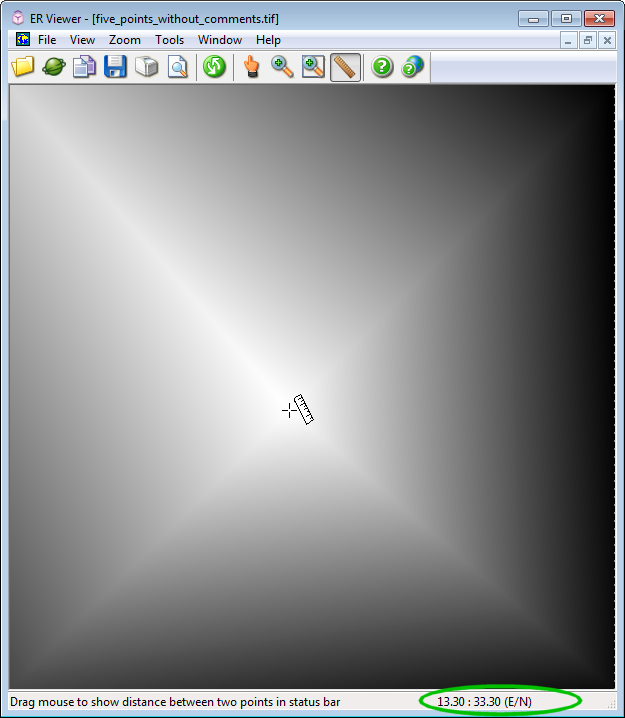
.tiffor the 32-bit image and.tfwfor the Tiff World File. The file specifications of the world file describe primarily the pixel size and the real world coordinates of the center of the upper left pixel.To verify the results we use the GIS Viewer ERDAS ER Viewer which can be downloaded for free after registration. During opening
five_points_without_comments.tifwith ERDAS ER Viewer the Tiff World File will be read automatically and geocoded coordinates of the cursor positions are displayed at the right of the status bar:
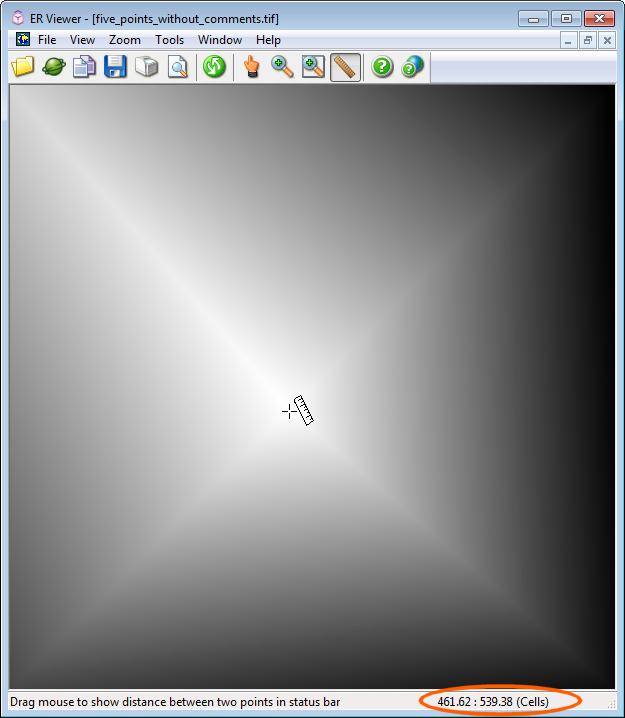
If the Tiff World File
five_points_without_comments.tfwis not at hand during import, pixel coordinates only are displayed at the right of the status bar:
![]() | XYZ2DEM Importer - Tutorials, Examples, Applications
| ImageJ Plugins by i3mainz
| ImageJ
| Privacy
| Imprint
| XYZ2DEM Importer - Tutorials, Examples, Applications
| ImageJ Plugins by i3mainz
| ImageJ
| Privacy
| Imprint
© 2012/07/02