Projective Mapping - Tutorial
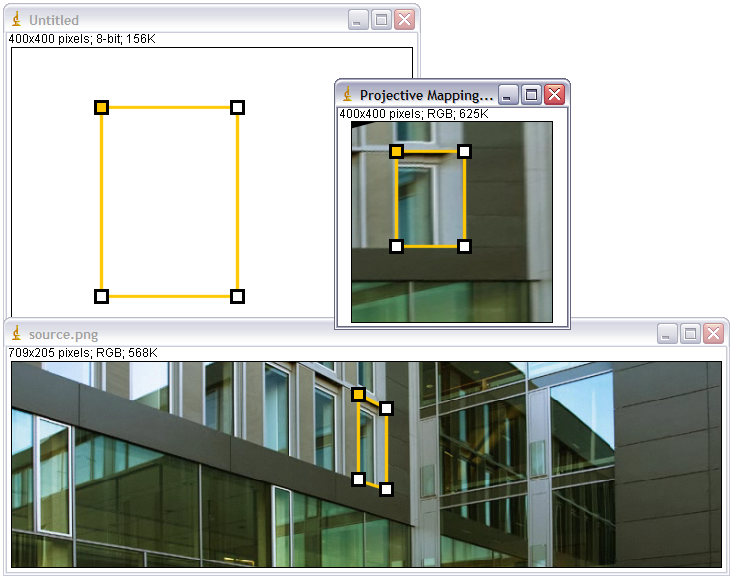
The ImageJ plugin Projective_Mapping performs a geometric transform requiring 4 control points.
Preliminaries:
- Download and unzip example image: source.zip.
- Download and install the package Geometric Mappings.
Proceeding:
- Open source image:
File > Open... source.png
- Open target image:
File > New > Image... OK
>notice: same image type as source image recommended
- Click Polygon selections:
3rd button from the left
- Create a polygon with 4 sides on both images:
create 4 points with the left mouse button and
click the first point again to close the polygon
>notice: the first point of the polygon is coloured
- Select Projective Mapping and choose settings:
Plugins > GeometryMappings > Projective Mapping
choose settings and press OK
>notice: if you don't create a new window the new image will replace the Target geometry image
- Result:
